One of the ways spam filtering systems determine if an email is spam is to check the email header to see if the server sending the email is an authorized sender. This is done by checking the DNS for the email address of the person sending the email (the FROM email domain) and seeing if that domain has given permission to ContentMX to send email on its behalf. This is known as an SPF record.
In addition, the signature of the email header is checked against a key stored with the domain to confirm the email is authentic. This is known as a Domain Key (DKIM).
For instance, if you are sending an email from norton@mycompany.com, the spam filter will check the DNS records of mycompany.com to see if it authorizes email to be sent from the ContentMX email servers AND if the DKIM signature correlates to the domain key.
To configure your domain for sending email, you should add both an SPF record and a set of DKIM records to your DNS.
Who will be your default sender when sending emails from ContentMX? You can assign your default sender by logging into your account and visiting My Profile. Fill out "Your Contact information" at the bottom of the page, and click save.
Add the SPF record
To authorize ContentMX as a sender, you (or your IT administrator) should add ContentMX to the SPF setting in your DNS. This is done by adding or modifying the TXT record containing the SPF information. You will be adding “include:contentmx.net” to this record.
For example, if your SPF record looks like this:
v=spf1 include:spf.protection.outlook.com ~all
you would modify it to look like this:
v=spf1 include:spf.protection.outlook.com include:contentmx.net ~all
Once this change is made, it may take a little time for it to replicate across the Internet.
Request and add your DKIM records
The process for adding DKIM records to your domain is as follows:
- Email support@contentmx.com and provide the email address you will use as your FROM address. This email address will include the domain where the DKIM records will be applied.
- The support team will email you back with three CNAME records to be added to your DNS. Here is an example of what these records might look like:
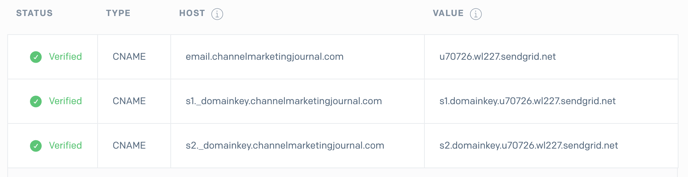
3. Add the three records we provide to you (not the ones in the sample above) to your DNS. Then, email support@contentmx.com again to let us know you have completed the DNS changes.
4. Our support team will check the validity of your changes and then complete the application of the domain keys. You will be notified when these steps are complete.