Your account can be connected to your Hubspot CRM as a method for transferring leads and contacts. The information can flow in two ways:
1. Collect and Pass new Leads (or Contacts) to a Hubspot Contact List
Contacts collected by Build Your List content and other lead forms can be assigned to Hubspot contact or marketing lists as Leads (or Contacts). You choose to assign Leads (or Contacts) to a specific list or automatically create a new list for each Build Your List Item.
2. Import Contacts from a Hubspot Contact List
Leads (or Contacts) associated with a particular Hubspot contact list can be imported into your account and synchronized with your email lists.
Creating a Hubspot CRM Network Connection
To get started, create a network connection between your account and your Hubspot CRM. This defines how the leads you collect from Build Your List items and other lead forms will be passed into Hubspot and associated with your Hubspot contact lists.
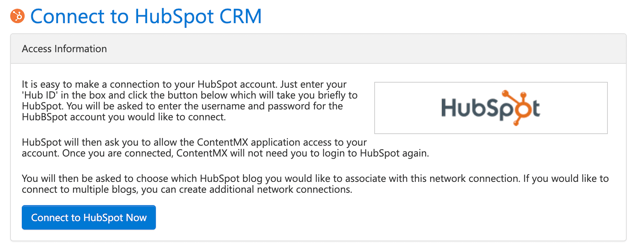
Step 1: Connect your Hubspot CRM:
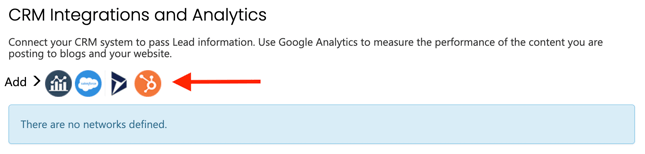
To create your Hubspot connection, go to Manage Networks and click the Hubspot icon under “CRM Integrations and Analytics."
Then, press “Connect to Hubspot Now”
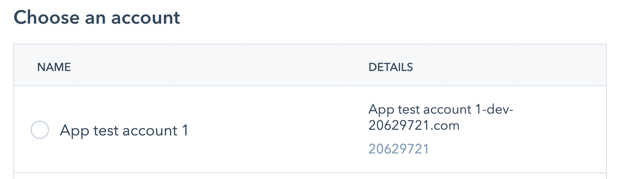
If you have more than one Hubspot account...
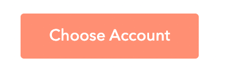
Choose the account you want to connect to and then press “Choose Account” in the open window:
Step 2: Choose the Hubspot Owner:
The Hubspot Owner will be the owner of these contacts. This can be changed in the drop-down menu or in Hubspot.

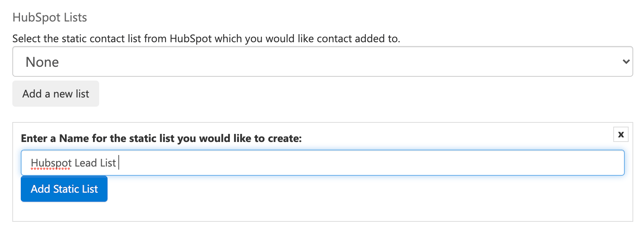
Step 3: Choosing a Hubspot List:
When leads from Build Your List items and other lead forms are passed into your Hubspot CRM, you can determine which Contact List they will be added to.
Option 1:
Select the most appropriate list option from the drop-down menu.

Option 2:
If you feel none of your current lists are the right fit, you have the option to “Add a new list” directly from the platform connection and this new list will be created in Hubspot.
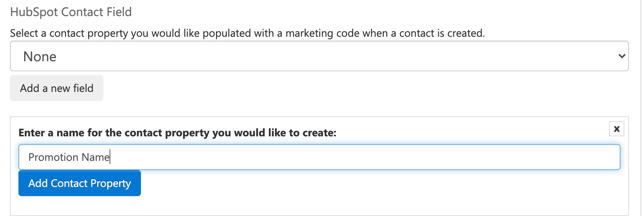
Step 4: Choosing a Hubspot Contact Field:
Use the “Contact Field” in the Hubspot connection to select a contact property you would like populated with a marketing code when a contact is created. Contact properties are fields that store information about your contacts, such as their email address, or the last time they filled out a form. HubSpot includes default properties in each account to store key information. Use the Contact Field to assign marketing codes to one of these properties or create a unique property field to distinguish these contacts from your other marketing contacts.
Option 1:
Select a property option from the drop-down menu.

Option 2:
If you don’t have a contact property already that you would like to populate when the contacts are passed through, you can click “Add a new field” to create your own right in the platform.
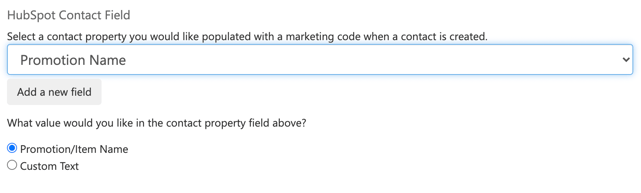
Once you create the custom property field, you can choose what you would like populated in the custom property field you made.
Option 1:
You can populate this field with the Promotion/Item name of the Build Your List asset that the contact chose to fill out. We recommend this option.
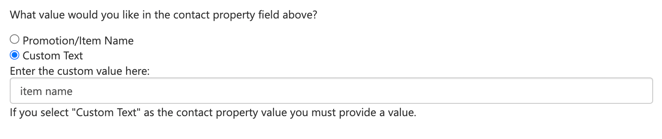
Option 2:
You can select “Custom Text” and provide a property value for the contact property that you want to populate in Hubspot. This value will be the same for each contact record.
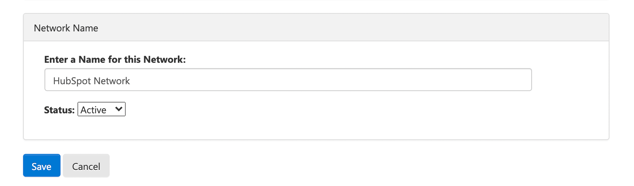
Step 5: Name your Hubspot CRM Network, set it to active, and then click Save.
NEXT: Select a "Build Your List" item from one of your channels. Publish it to one of your social networks. Once the item is published, you will see a link that opens a Lead Form. Users will need to complete this form to receive the associated content. When this form is completed, the information from that form will be passed into your HubSpot account using the parameters you set when the connection was made.
Importing Contacts and Leads to a List
In addition to sending contacts and leads to Hubspot, you can also import contacts or leads from Hubspot and add them to a specified email network in your account.
To import contacts from Hubspot:
Step 1: Select Contacts > Import Contacts from the menu:

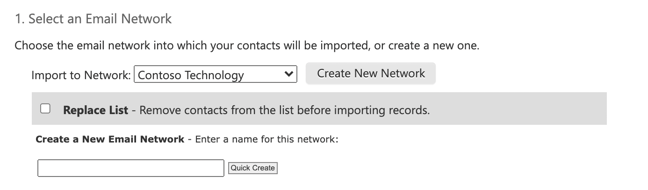
Step 2: Choose the Email Network:
From the drop-down, choose where you want the Hubspot leads or contacts to appear. To replace the entire list, choose the “Replace List” check box.
To import contacts into a new email network right in the platform, click the “Create New Network” button, enter a name for this network, then click “Quick Create”
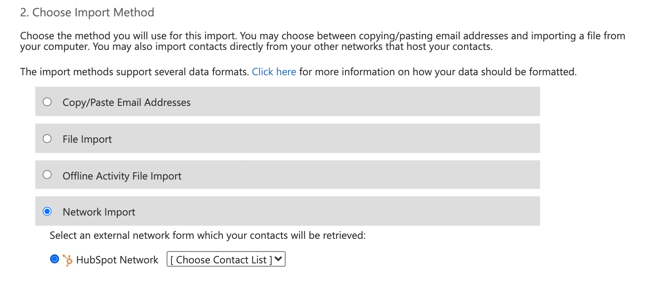
Step 3: Select the Network Import option:
Click on “Network Import” to see the network options you have, and click on the Hubspot network you want to use. This option will pull the contacts in from Hubspot to the platform. They will go into the email list you have defined from Step 2.
Step 4: Choose which Hubspot Contact List you want to import contacts from using the drop-down menu:

Step 5: Choose the level of opt-in permission:
You can assign these contacts as having Unknown, Implied, or Express permissions. Click Submit Import when you are ready to proceed. As a final step, you will be prompted to map your fields.
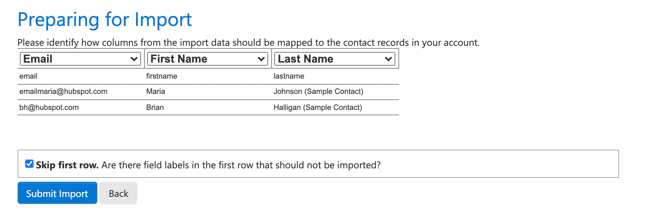
Once these steps are complete, the import operation will be run. This will operate the same as if you used the other import options, like copy and paste or uploading a CSV file.
Do you have questions or feedback about this feature? Let us know!